 Save
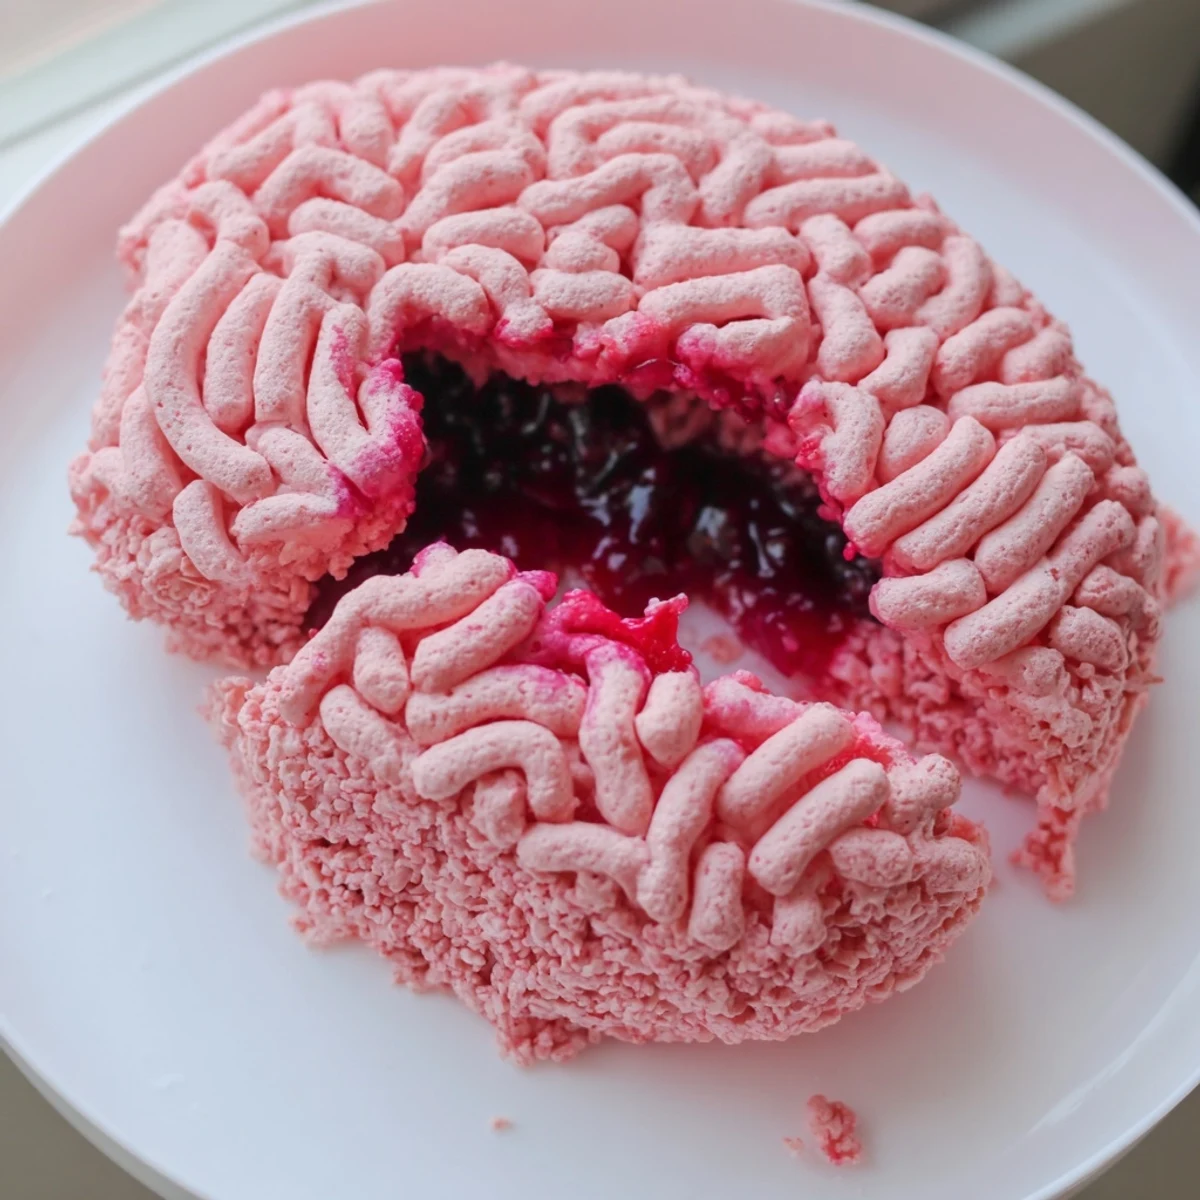
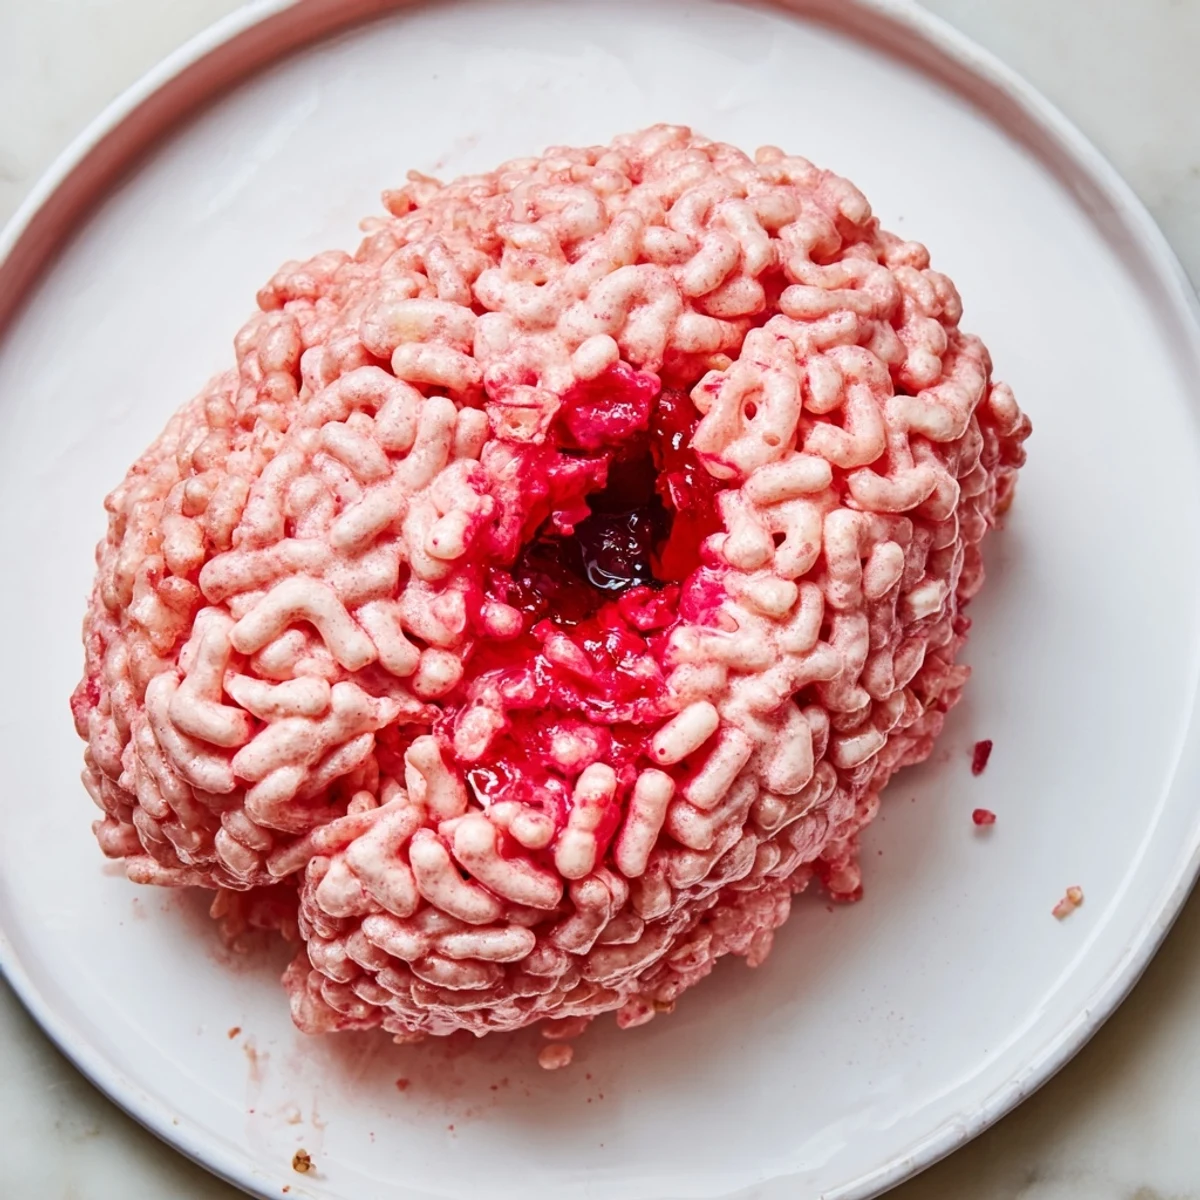
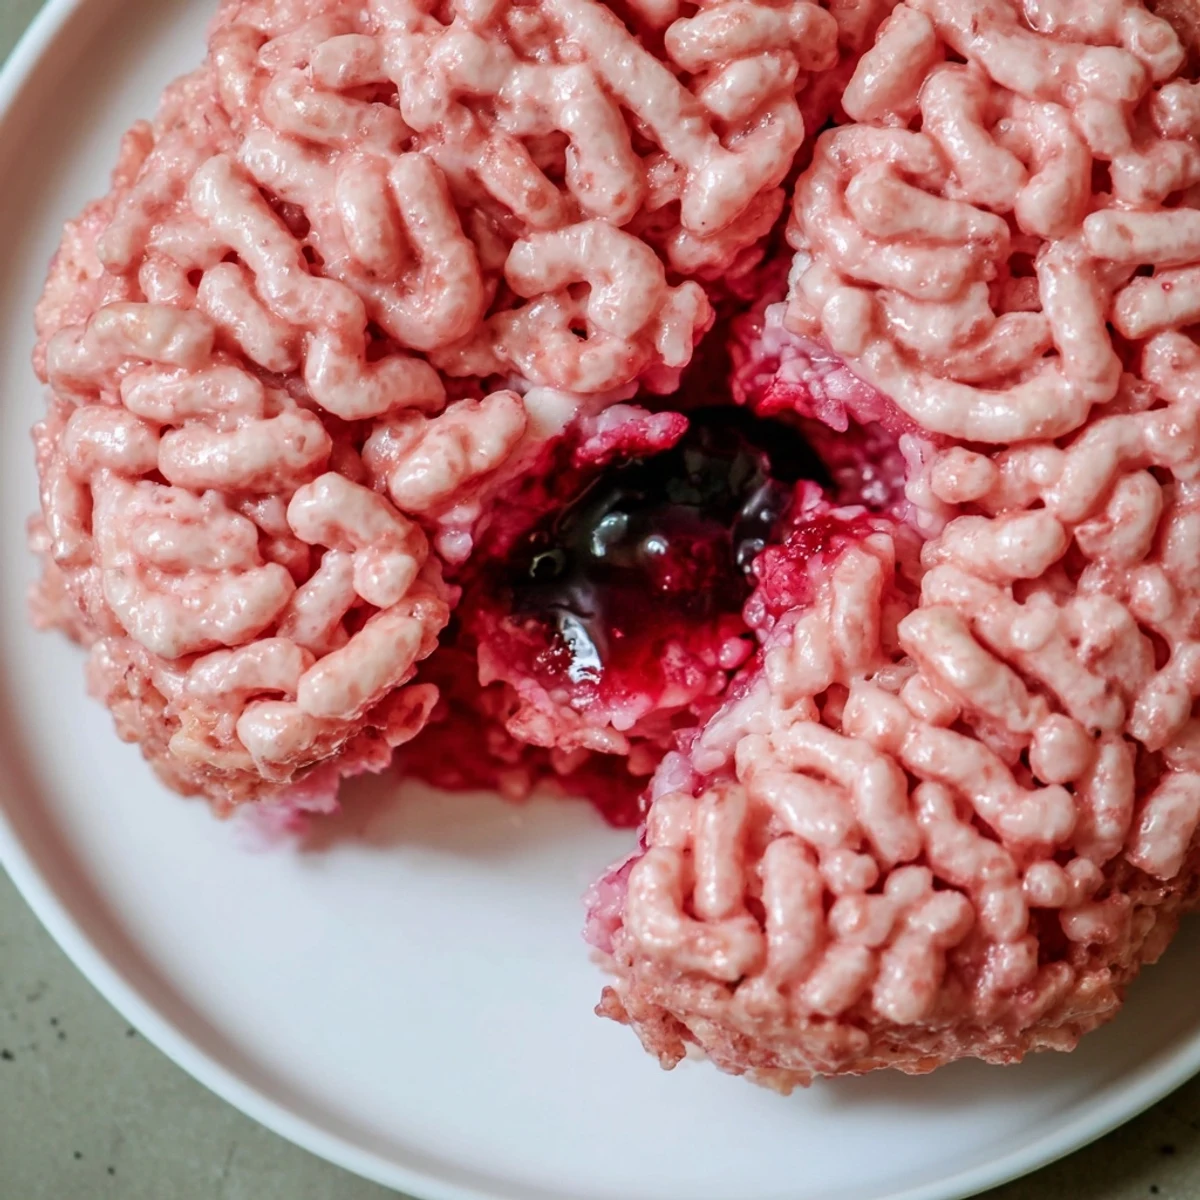
Save This hauntingly sweet creation transforms classic crispy rice treats into an eerie brain-shaped dessert with a hidden surprise. The exterior features pink-tinted cereal mixture molded into authentic brain contours, while the center conceals a luscious raspberry or strawberry jam filling that dramatically oozes when sliced.
Ideal for Halloween parties and autumn celebrations, this interactive dessert combines nostalgic flavors with playful presentation. The process involves melting marshmallows with butter, tinting the mixture with food coloring, then carefully shaping around a jam-filled cavity. Professional decorators can add detailed ridges with food coloring or adorn with candy eyes for maximum spookiness.
The kitchen counter was covered in sticky pink fingerprints and my roommate stood there grinning, holding what looked suspiciously like a cerebrum made of cereal. We'd spent way too many horror movies brainstorming Halloween treats, but this one actually worked. When we sliced into it at the party later, the jam oozing out made everyone groan in delighted horror.
Last October I made three of these brains for different gatherings because people kept requesting them. The best reaction was from my friend's five-year-old nephew, who took one look at the platter, whispered cool, and immediately asked if he could poke it.
Ingredients
- Crispy rice cereal: The structural foundation of your edible organ—about 6 cups gives you enough to work with
- Unsalted butter: 3 tablespoons keeps the marshmallow mixture from sticking to everything
- Mini marshmallows: One 10 oz bag melts down into the glue that holds your brain together
- Red or pink food coloring: Start with a few drops, you can always add more for that freshly-removed look
- Raspberry or strawberry jam: Half cup creates the essential gooey filling surprise
- Seedless berry coulis: 2 tablespoons optional but makes the oozing effect extra dramatic
Instructions
- Prep your brain mold:
- Use a brain-shaped mold if you're fancy, or line a medium bowl with plastic wrap and press it in to create the classic hemispheres
- Melt the base:
- Butter goes into a large saucepan over medium heat, then dump in the marshmallows and stir until completely melted and smooth
- Add the gore factor:
- Drop in red food coloring a few drops at a time until you achieve a color that says brain without looking like cartoon slime
- Form the cerebrum:
- Remove from heat, stir in the crispy rice cereal until coated, let it cool until you can touch it without burning your fingers
- Create the cavity:
- With buttered hands, press half the cereal mixture into your mold, pushing up the sides to leave a hollow center for the filling
- Add the surprise:
- Spoon the jam and coulis into the cavity, keeping it away from the edges so it doesn't leak through
- Seal it up:
- Gently press the remaining cereal mixture over the filling, sealing it completely inside
- Shape and set:
- Press and pinch the surface to create brain-like folds and ridges, then let it sit for 20 to 30 minutes until firm
- The final reveal:
- Unmold carefully onto a serving plate, use food coloring and a small brush to add extra detail lines if desired, add candy eyes for maximum creepiness
- Serve and terrify:
- Slice into wedges and watch the berry filling ooze out like something from a biology class gone wrong
 Save
Save My first attempt looked more like a lumpy potato than a brain, but by the third try I'd figured out that using a buttered spoon helped create those characteristic squiggly patterns. Someone suggested adding candy eyes and suddenly it went from anatomy model to party centerpiece.
Making It Realistic
Thin lines of darker red food coloring painted into the crevices add depth and make the folds pop. A clean paintbrush dedicated to food works better than trying to drizzle it freehand.
Filling Variations
Cherry preserves give you a darker, more dramatic ooze while raspberry stays bright and shocking. Mix a little gel food coloring into your jam for even more intensity.
Serving Ideas
Place your brain on a platter surrounded by crackers or arrange it with plastic spiders crawling toward it for maximum effect.
- A small kitchen torch can lightly toast the surface for a slightly different texture
- Cut slices varyingly thick so some pieces ooze more than others
- Keep extra food coloring handy for touch-ups after transport
 Save
Save There's something deeply satisfying about serving food that makes people squirm and laugh at the same time. This brain has become my go-to Halloween contribution, mostly because the reactions never get old.
Common Questions
- → How far ahead can I prepare these brains?
-
These treats stay fresh for 2-3 days when stored in an airtight container at room temperature. For best results, prepare up to 24 hours before your event to maintain optimal texture and prevent the filling from becoming too runny.
- → Can I make these gluten-free?
-
Absolutely. Simply use certified gluten-free crispy rice cereal and verify that your marshmallows are manufactured in a gluten-free facility. The remaining ingredients are naturally gluten-free.
- → What other fillings work well?
-
While raspberry and strawberry jam provide the most dramatic effect, try cherry preserves for darker coloring, Nutella for chocolate lovers, or even lemon curd for a tart twist. Thicker fillings create better oozing effects.
- → Do I need a special brain-shaped mold?
-
No specialized equipment required. Line any medium bowl with plastic wrap and shape the mixture by hand, or use a silicone dome mold. The natural texture allows easy sculpting into brain-like contours with your fingers.
- → How do I achieve realistic brain coloring?
-
Gel food coloring provides more intense, natural-looking hues than liquid versions. Start with pink, then add tiny amounts of red to reach your desired brain-like shade. Brush additional diluted coloring along the surface for enhanced veining effects.
- → Can I double this batch for larger parties?
-
Yes, simply multiply all ingredients accordingly. Work in batches when melting the marshmallow mixture for easier handling, and ensure you have adequate molds or bowls prepared before beginning the shaping process.