 Save
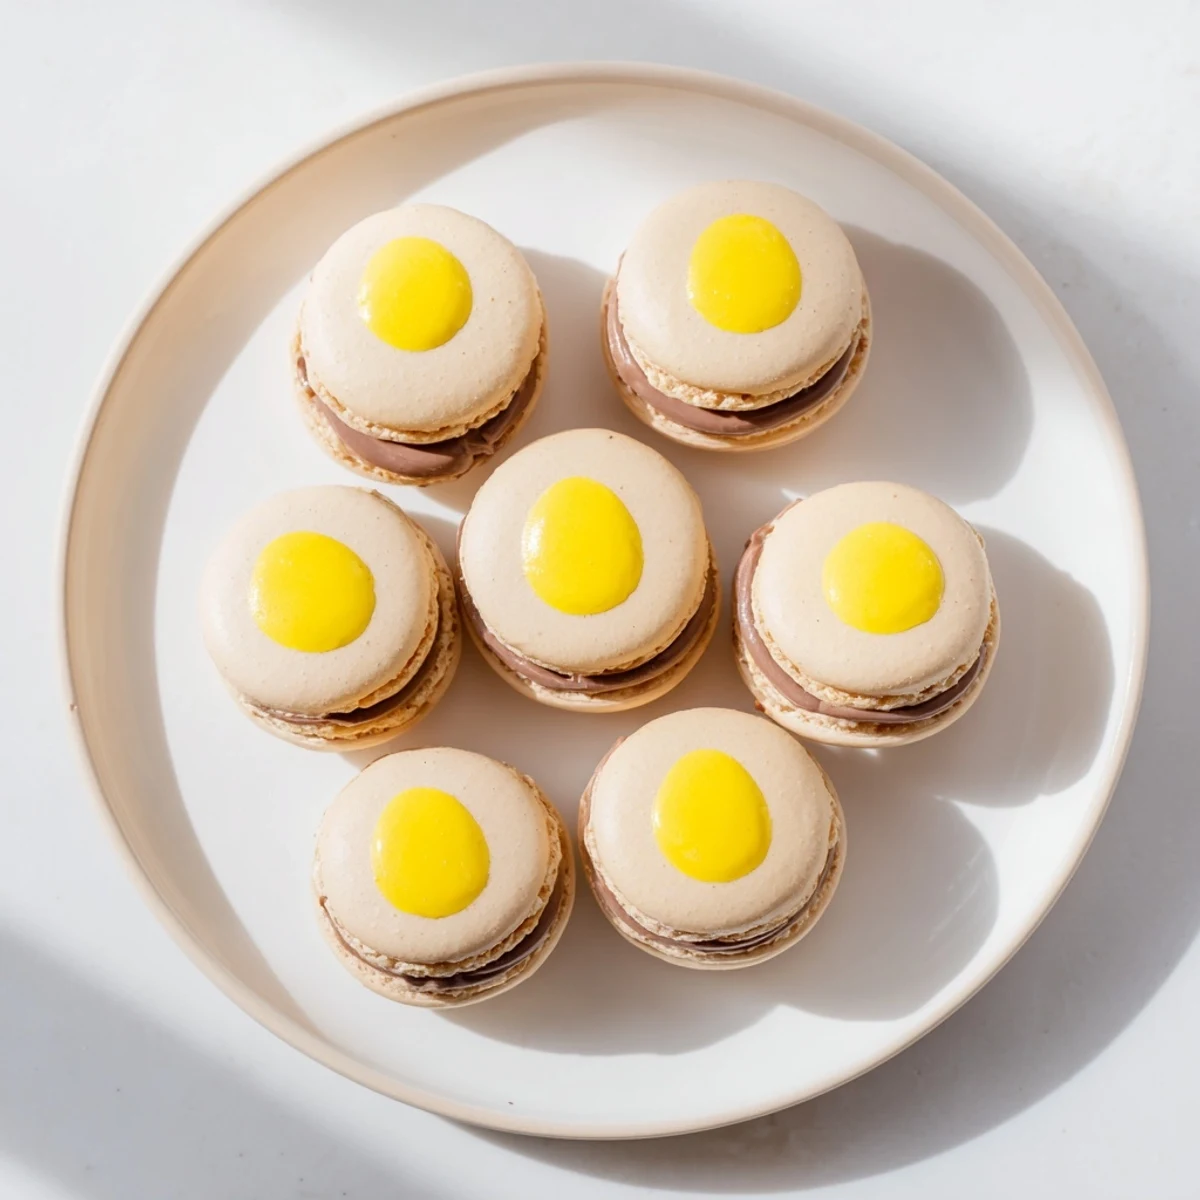
Save These delicate French confections feature crisp almond shells paired with a luscious milk chocolate ganache filling that captures the essence of Cadbury Creme Eggs. The signature element is the bright yellow center that mimics the iconic egg yolk, creating both visual appeal and nostalgic flavor. The process involves creating a proper meringue, mastering the macaronage technique, and preparing a smooth chocolate ganache that's perfect for piping. While these require patience and practice to perfect, the stunning Easter-worthy results make them worth the effort. Best enjoyed after 24 hours to allow flavors to meld and shells to achieve ideal texture.
The first time I attempted macarons, I stood in my kitchen staring at egg whites that refused to whip, wondering if French pastry chefs were hiding some ancient secret. Three failed batches later, I finally understood that macarons are less about perfection and more about patience—and these Cadbury Egg versions became my redemption story. Now every Easter, my kitchen becomes a whirlwind of pastel dust and chocolate-scented steam, and somehow the mess feels part of the magic.
Last spring, I made these for my sister's birthday and watched her face light up when she bit into the first one. She immediately recognized the Cadbury flavor from our childhood Easter baskets, but the sophisticated macaron shell made it feel like something entirely new. Now she requests them for every gathering, and I've learned that sometimes the most nostalgic flavors deserve the most elegant treatment.
Ingredients
- Almond flour (100 g): Sift this twice with the powdered sugar to avoid any gritty texture in your delicate shells
- Powdered sugar (100 g): The fine texture creates that signature smooth macaron surface we all want
- Egg whites (90 g, about 3 large): Room temperature whites whip up better and faster, so plan ahead
- Granulated sugar (90 g): Add this gradually to stabilize your meringue for maximum volume
- Cream of tartar (1/4 tsp): This tiny amount makes a huge difference in meringue stability
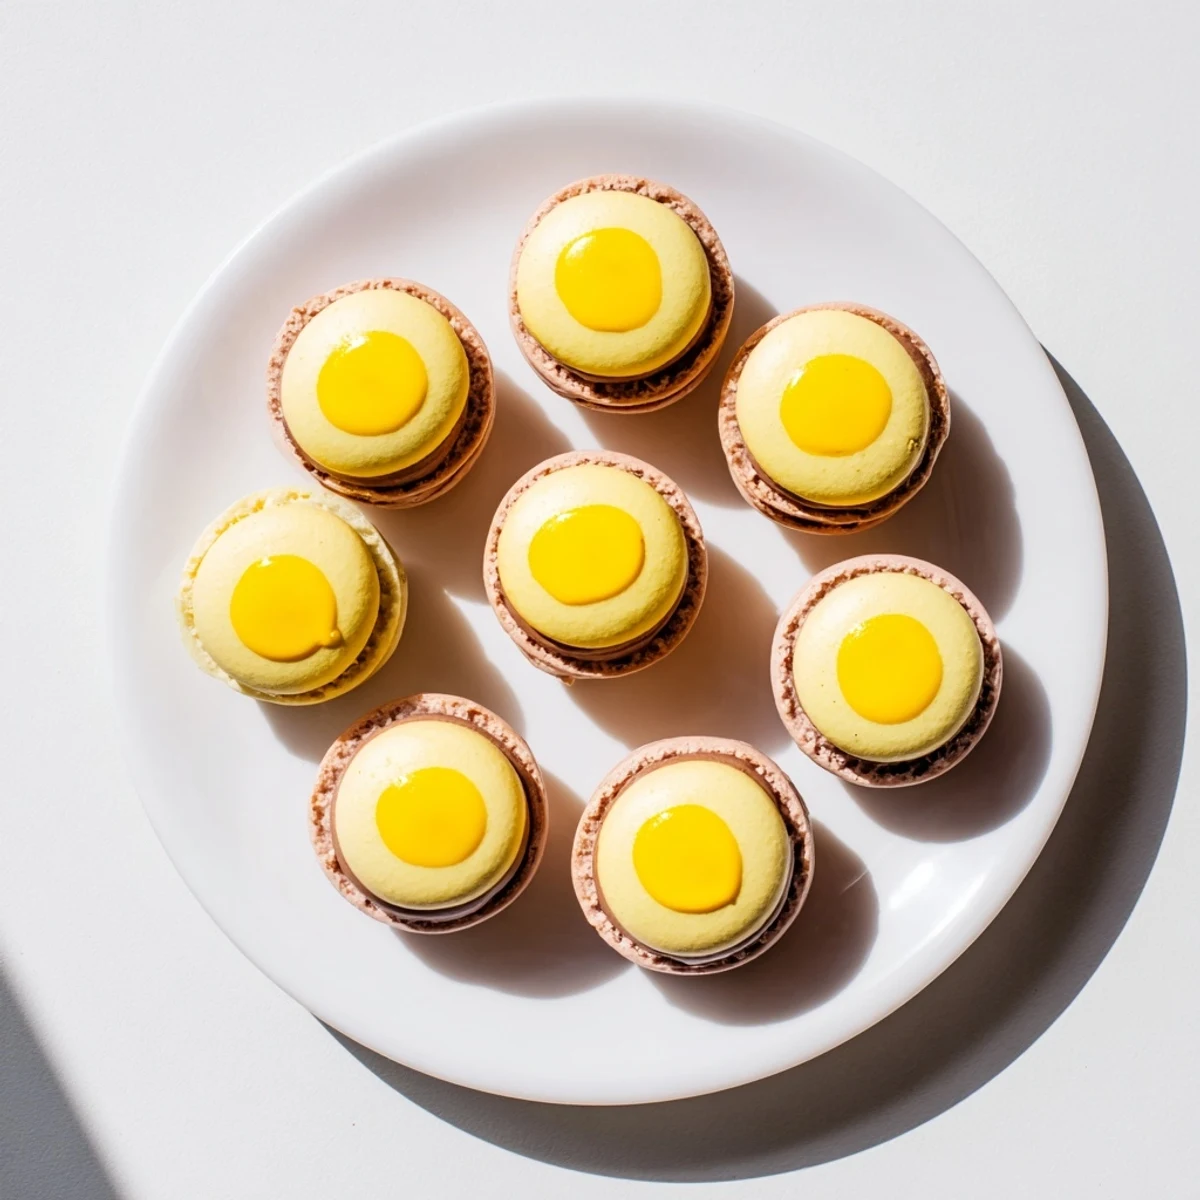
- Food coloring (optional): Yellow for the yolk effect or pastel shades for festive Easter vibes
- Milk chocolate (100 g, preferably Cadbury Dairy Milk): Using the real thing gives that authentic nostalgic flavor
- Heavy cream (50 ml): Heat this just until you see bubbles around the edges
- Golden syrup (3 tbsp): This keeps the ganache glossy and prevents it from seizing
- Unsalted butter (50 g), softened: Room temperature butter blends smoothly into the cooled ganache
- Yellow gel food coloring: A tiny amount transforms some filling into that iconic egg yolk center
Instructions
- Prepare your workspace:
- Line two baking sheets with parchment paper or silicone mats and fit a pastry bag with a 1/2-inch round tip. Having everything ready before you start will prevent frantic scrambling later.
- Sift the dry ingredients:
- Combine the almond flour and powdered sugar in a bowl, then sift them together twice. This extra step is tedious but absolutely worth it for smooth shells.
- Whip the meringue:
- In a completely clean and dry bowl, whisk egg whites and cream of tartar until soft peaks form. Gradually add granulated sugar, continuing to whisk until you have stiff glossy peaks that hold their shape.
- Master the macaronage:
- Gently fold the almond flour mixture into the meringue in three additions. If you want the yolk effect, tint one third of the batter yellow. The batter is ready when it flows in thick ribbons that disappear back into themselves within 30 seconds.
- Pipe the shells:
- Transfer batter to your prepared pastry bag and pipe 32 rounds about 1.5 inches each onto the baking sheets. Hold the bag perpendicular to the tray for perfectly round shells.
- Rest the shells:
- Firmly tap each tray on the counter to release any trapped air bubbles. Let the shells sit at room temperature for 30 to 60 minutes until the surfaces are completely dry to the touch.
- Bake to perfection:
- Preheat oven to 150°C (300°F). Bake for 13 to 15 minutes, rotating the pans halfway through. The shells are done when they lift easily from the mat without sticking.
- Make the chocolate ganache:
- Heat heavy cream until just simmering, then pour over chopped milk chocolate and let sit for 2 minutes. Stir until smooth, then add golden syrup and butter, mixing until glossy.
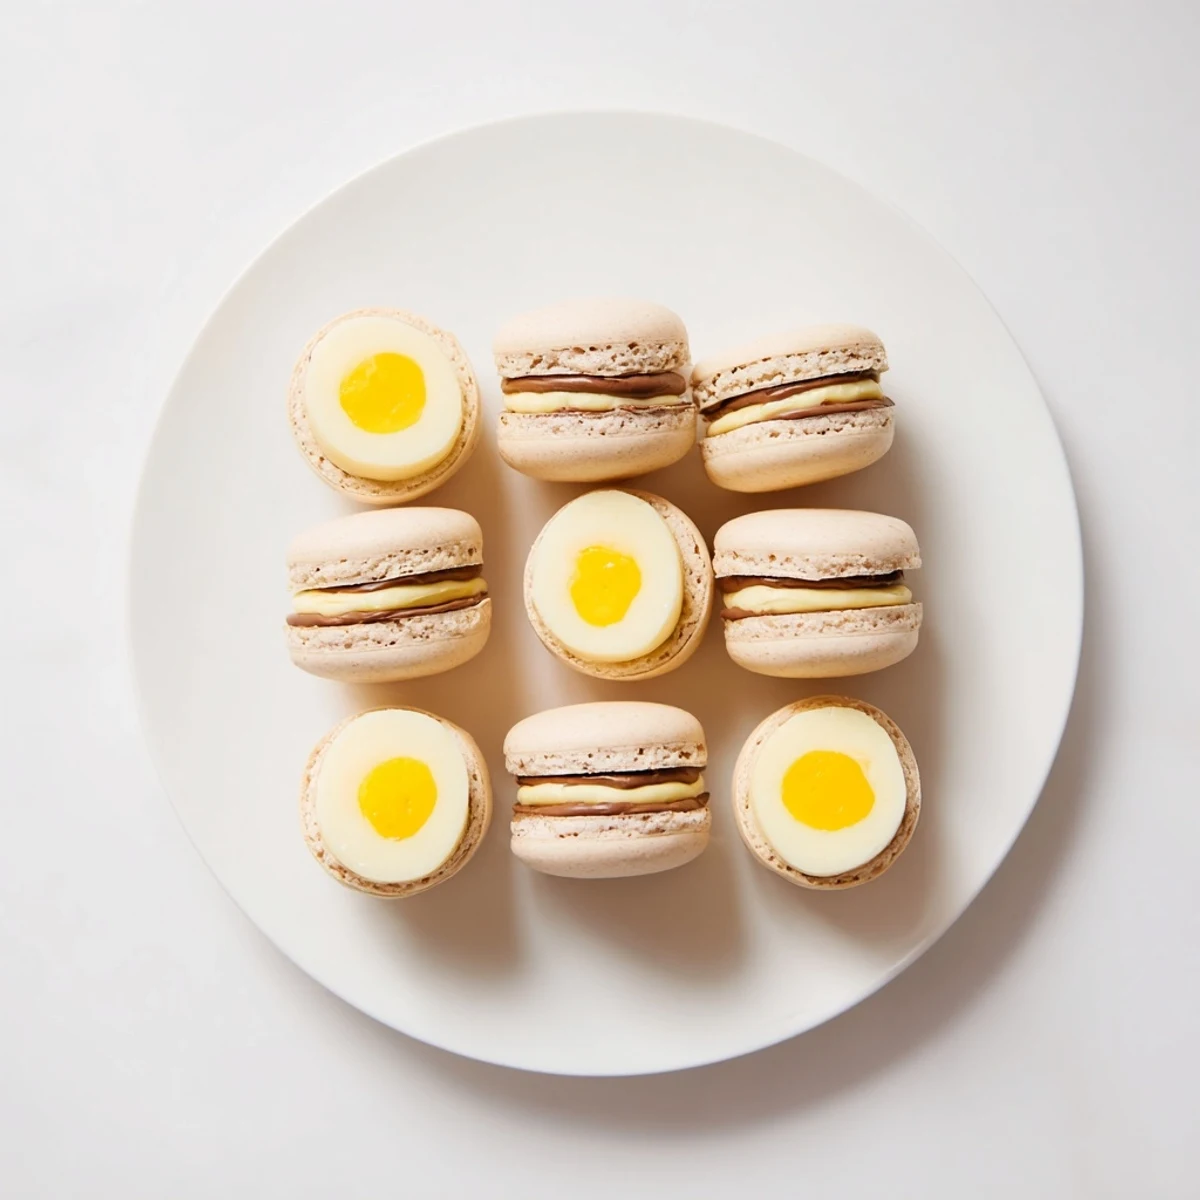
- Create the yolk effect:
- Reserve one quarter of the filling and tint with yellow gel coloring. Chill both fillings until thickened enough to pipe without spreading.
- Assemble your creations:
- Pipe a ring of chocolate filling on one shell, then place a small dollop of yellow filling in the center. Gently sandwich with another shell and repeat with remaining macarons.
 Save
Save When I first served these at Easter dinner, my normally stoic father took one bite and immediately asked if there were more. Watching adults get genuinely excited about something that looks so fancy but tastes like childhood candy became one of my favorite kitchen moments. Sometimes food is just food, but these little sandwiches of nostalgia and technique feel like something special.
Perfecting Your Shells
The number one mistake I see with macarons is rushing the resting period. Those 30 to 60 minutes when the shells sit on the counter develop a thin skin that helps them rise properly in the oven and form those coveted feet. If you touch the surface and your finger comes away clean, they are ready to bake.
Mastering the Filling
I learned the hard way that adding butter to hot chocolate causes it to separate and seize. Let your ganache cool to body temperature before folding in the butter, and you will end up with the smoothest, most luscious filling imaginable. The texture should be like thick frosting when you are ready to pipe.
Storage and Serving
Macarons actually improve with age, so do not be tempted to serve them immediately. The flavors need at least 24 hours to meld together and the shells to soften slightly for that perfect texture contrast.
- Store assembled macarons in an airtight container in the refrigerator
- Let them come to room temperature for 20 minutes before serving
- They will keep beautifully for up to 5 days
 Save
Save These Cadbury Egg macarons have become my go-to for spring gatherings, and I hope they bring a little nostalgic joy to your table too. Happy baking.
Common Questions
- → Why must macaron shells rest before baking?
-
Resting allows a skin to form on the surface of each shell, which helps them develop the signature 'feet' during baking and prevents cracking. The surface should feel dry to touch before entering the oven.
- → Can I make these without a stand mixer?
-
Yes, an electric hand mixer works perfectly for whipping the meringue. Just ensure your bowl is completely clean and dry, and whip until stiff glossy peaks form before adding the dry ingredients.
- → How do I know when the macaronage is properly mixed?
-
The batter is ready when it flows in thick ribbons from your spatula and the ribbons disappear back into the batter within about 20 seconds. Under-mixing creates lumpy shells, while over-mixing causes flat, spread-out macarons.
- → Why do my macarons crack in the oven?
-
Cracking typically occurs when shells haven't rested long enough to form a proper skin, when the oven temperature is too high, or when there's excess air in the batter. Ensure proper resting time and tap pans firmly to release air bubbles before baking.
- → How long do these macarons stay fresh?
-
Properly stored in an airtight container, these keep for up to 5 days refrigerated. They actually taste better after 24 hours as the filling softens the shells slightly and flavors meld together. Bring to room temperature before serving.
- → Can I freeze the unfilled shells?
-
Absolutely! Once completely cooled, unfilled shells can be frozen in an airtight container for up to 3 months. Thaw at room temperature before filling with your prepared chocolate ganache.